
Welcome
I really started The Outdoor Gems to share outdoor experiences through photography and storytelling to inspire more people to get outside. If more people got outdoors; took a walk, hike, went snowboarding, sat around a campfire, and surfed in the ocean, I think the world would be a better place.
-Jeremiah
The Latest

Snowboarding on your first Day, Top Tips and Advice
Alright so you’ve thought about giving snowboarding a try or you’ve been considering switching over from skis for a day to see what it’s all about. One of the most rewarding activities you’ll get into is snowboarding (also pretty challenging at times). Riding a snowboard will teach you a lot of life lessons through..
Disclosure: When you buy something through the Affiliate product links I have created below, I earn a small commission. I only promote products and companies I support as well as believe in.
I remember the first time I went snowboarding, Mad River Mountain in Ohio. All my friends were signing up for middle school ski club and so of course my brother and I signed up too. Buying used equipment at our local skate/snowboard shop Sunsports, we were set up to go every Tuesday and Thursday after school. After a day or two of learning how to make it down a run, I was hooked. Something about riding down the mountain on a snowboard, it’s different, a freedom like feeling. No coaches telling you what to do or how to do it, just you, your board, maybe some friends, and the mountain (or Hill lol).So maybe you’ve thought about giving snowboarding a try or you’ve been considering switching over from skis for a day to see what it’s all about. One of the most rewarding activities you’ll get into is snowboarding (also pretty challenging at times).
Riding a snowboard will teach you a lot of life lessons through your successes and failures on snow.! It’s also a great way to meet other like minded people who want to spend time outdoors in the winter. Who knows, you might even meet some of your lifelong best friends through it. In this post I’ll be going over the basic fundamentals to get started with snowboarding, what gear to wear, renting equipment, and lastly what you can expect. Alright lets gooo.
What should I wear
I’m not going to lie, snowboarding gear is EXPENSIVE. However, there are ways to make it affordable if you’re not looking to spend a whole lot of money. Consignment shops, holiday sales, sales on previous years gear, and getting a job at a ski resort (resort employees get discounts on winter gear) are all ways to save money on snowboard gear. If you’re unsure on if you’ll like snowboarding or not I would go the route of cheaper before you invest a bunch of money into the sport. Below I listed the items you’ll need for your first day.


Jacket- This needs to be waterproof and have some warmth. If you’re starting out, it’s better not to get too technical on gear and to have something that will keep you warm as well as dry on the mountain!
Snow Pants- These also need to be waterproof and warm. A good pant to start with is Burton’s Cargo pant. They make this pant in tall sizes and also short sizes. The Burton women’s Society Pant is also a great starter snow pant.
Goggles- You’ll need these to protect your eyes from snow, wind, and sun. Oakley, Anon, Smith, and Giro all make great goggles for someone starting out.
Gloves- Gotta keep your hands warm when on the mountain or strapping into the board. Hestra and Burton will offer some great options that last longer then one season. If you don’t want to spend too much, Walmart or Amazon will sell more affordable options that will also keep your hands warm for the day.
Helmet- The majority of people wear a helmet on the mountain and rental shops will include them in your rental package. Although not a requirement, I would highly recommend wearing one.
Ski socks- Stay away from Cotton! Anything that has wool or polyester will be able to wick moisture and keep your feet warm!
Base Layers- Wear these under your pants and jacket. Again stay away from anything cotton! Burton will make some of the best base layers. Since they offer a lot of options, I would recommend a mid-weight option.


Should I use protective equipment other then a helmet
It doesn’t hurt to wear protective equipment with being new to snowboarding, Burton makes wrist guards, knee pads, and impact shorts
Sizing
You’ll want the board to be shorter as it is easier to turn. Boots should be snug, about a half size down from your normal tennis shoes. Bindings will have a boot size range you’ll need to follow. Binding sizes come in Small, Medium, and Large.
Key Snowboard Terms
Stance Width- The width between your feet on the snowboard.
Bindings- What keeps your feet attached to the snowboard.
Binding Angles- Bindings will have numbers on them that correlate with how each foot is angled on the snowboard. This is a personal preference for every snowboarder.
Regular- Riding down the mountain with the left foot forward
Goofy- Riding down the mountain with the right foot forward
Base- The bottom of the snowboard
edges- The sharp metal part that goes around the entire snowboard
Topsheet- Top of the snowboard
Straps- The parts that go over the snowboard boot, locking in the boot to the binding.
Highback- A Part on the binding that supports the back of the snowboard boot.
Channel- A way to mount snowboard bindings to the board using only two points of contact for each binding.
4 Hole pattern- A more traditional way to mount snowboard bindings to the board using 4 points of contact for each binding
Heelside- Edge of the board where the heels of your snowboard boot are
Toeside-Edge of the board where the toes of your snowboard boot are
Skating- Pushing the snowboard with your back foot to get from point a to point b. Your lead foot will be strapped into the binding when doing this.
Stomp Pad- a grippy pad that is placed in between the bindings towards the middle of the snowboard. It helps with stability when getting on and off a chairlift.
Can you rent gear for Snowboarding
Yes! However for most places you’ll only be able to rent the board, boots, and bindings. Some shops will rent the jackets and pants, but I have found those places to be few and far between. Goggles and gloves you will always have to buy.
I recommend renting an LTR set up for your first day. LTR stands for Learn to Ride. The set up will be much softer and more playful, allowing you to learn the basic fundamentals of snowboarding. For busier times of the ski season make sure to, make a rental reservation in advance through the ski resorts website!


Is Step ON worth trying on my first day
You can, however, since Step on Boots and Bindings are more performance oriented the flex will be stiffer. A stiffer set up makes it harder to initiate a turn on a snowboard if you have never done it before. I think LTR is still the way to go on your first day. If you like snowboarding after trying it, Step Ons are great for getting in and out of a board without having to deal with straps.

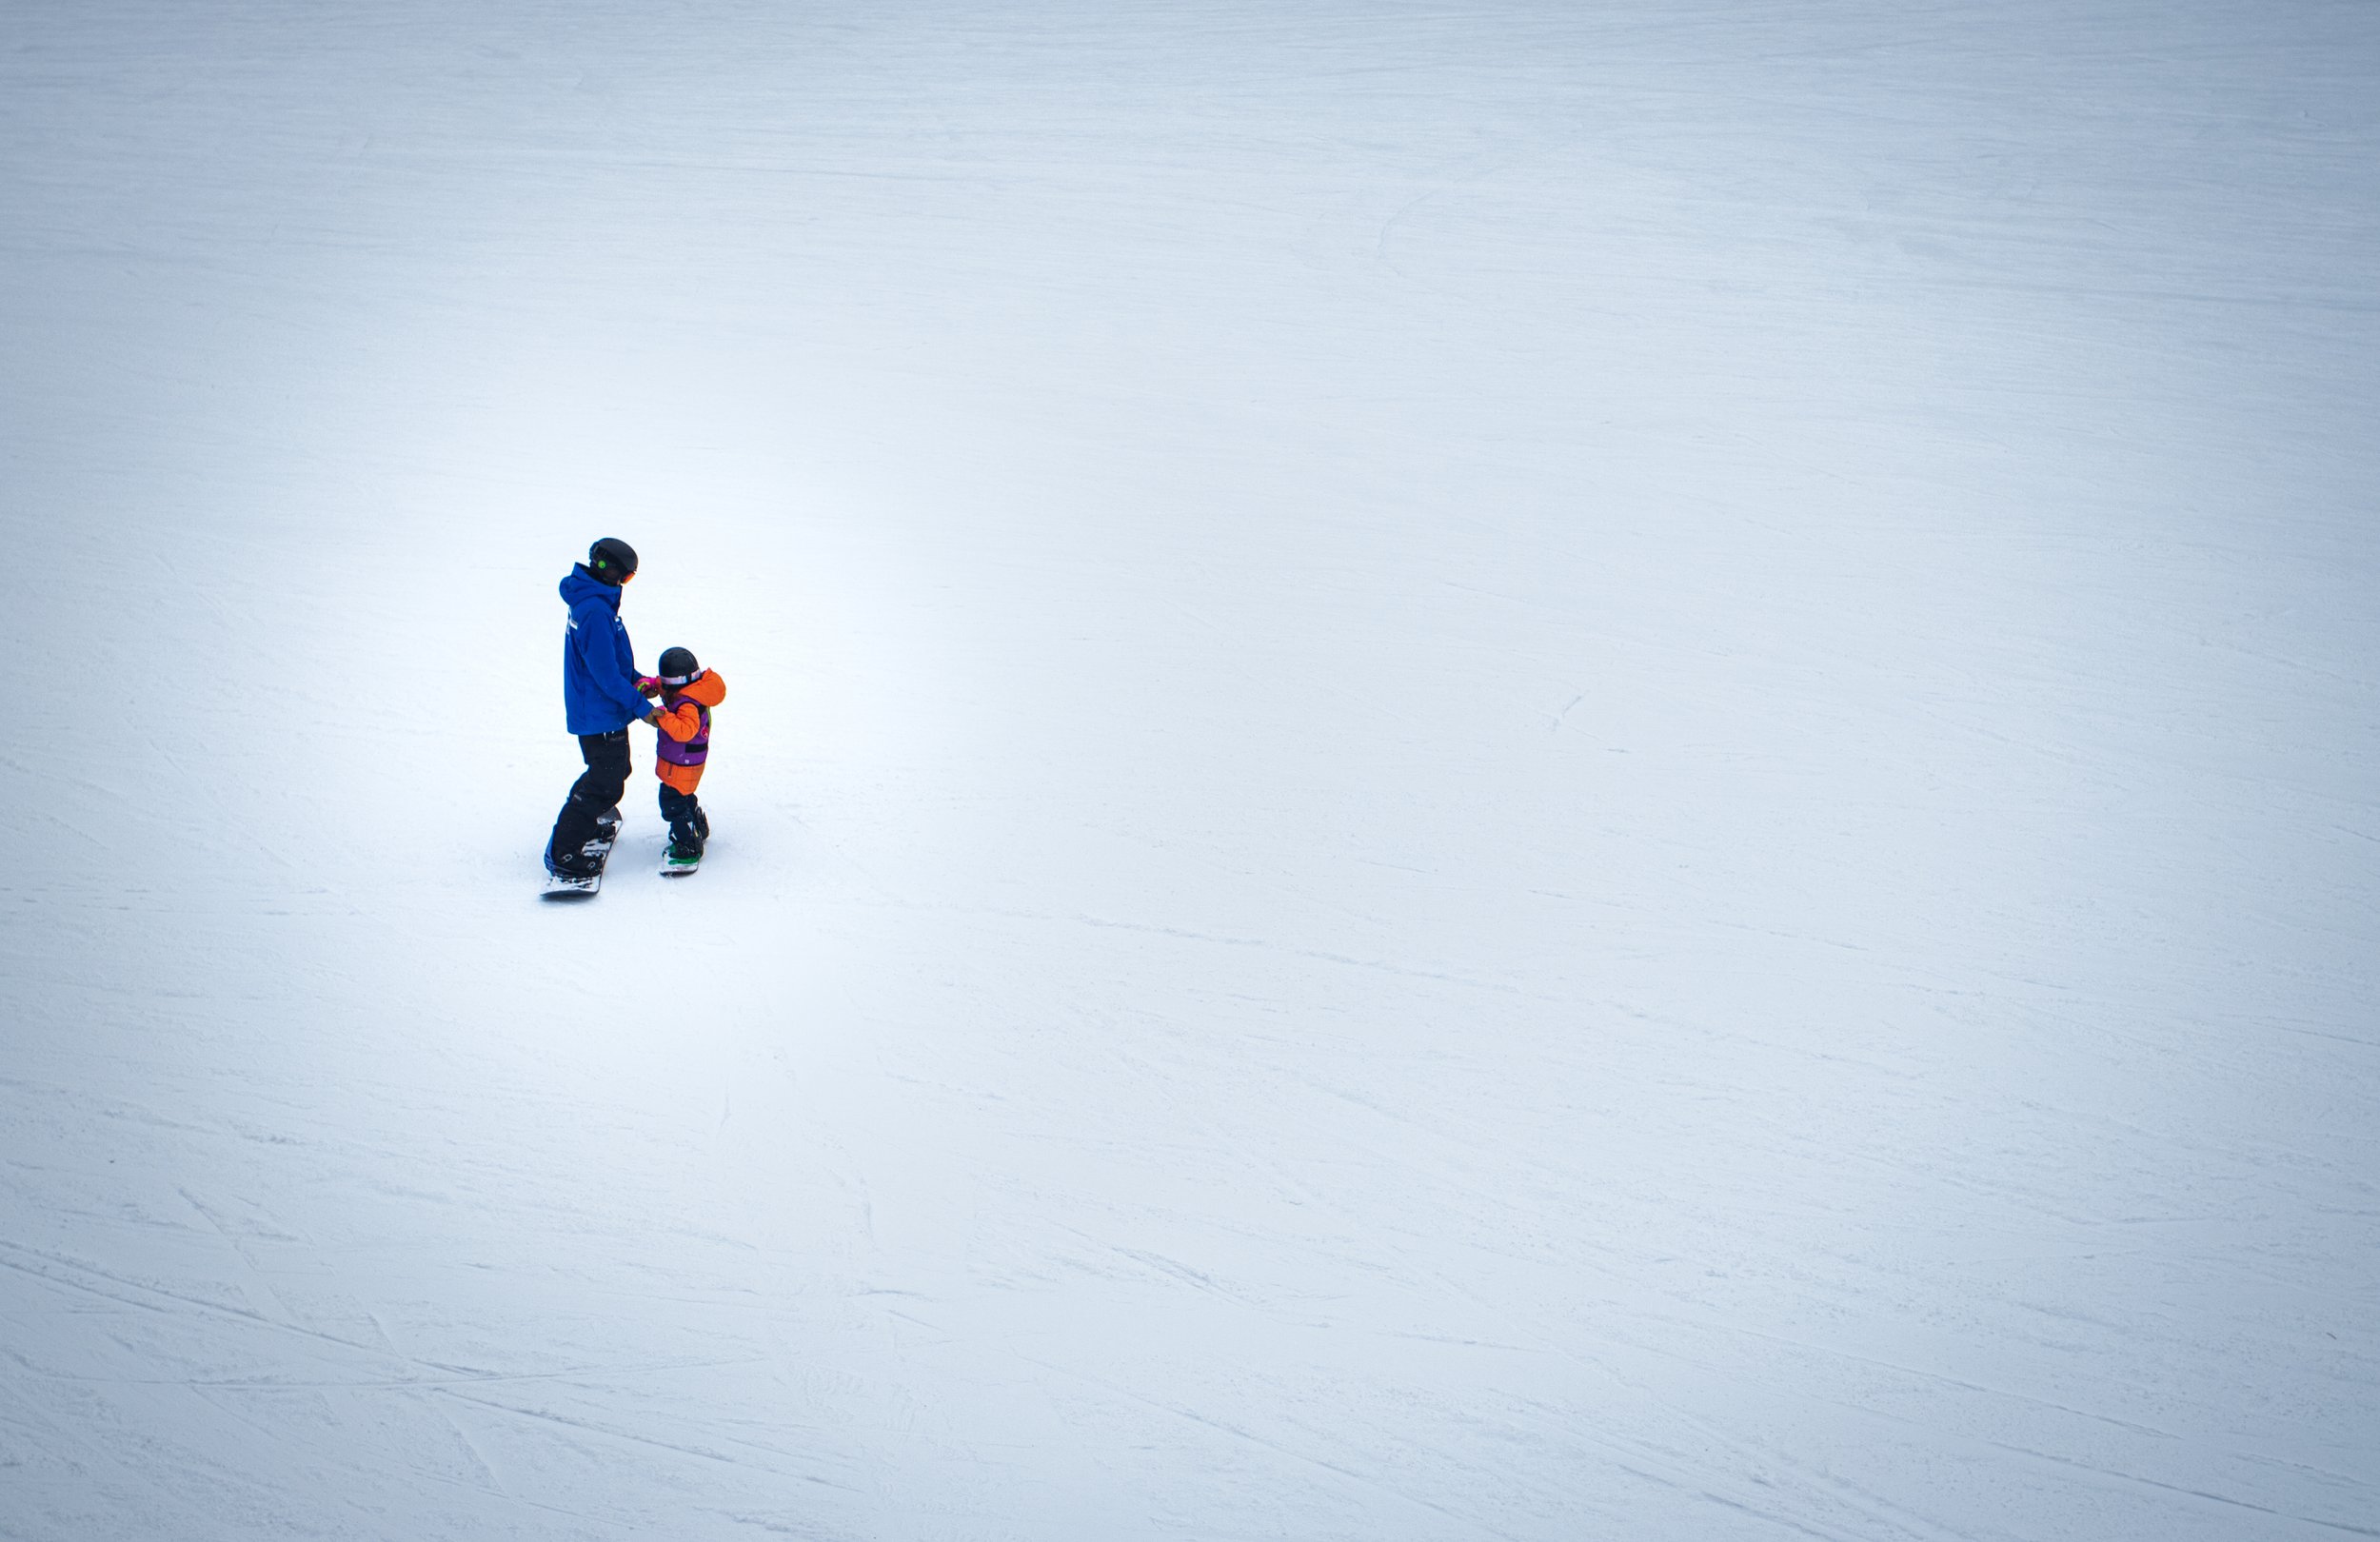
Do you recommend taking a lesson
I definitely recommend taking a lesson on your first day. Resorts will typically offer half day, full day, and group or private lessons. They will be able to teach you the basic fundamentals of snowboarding as well as how to use your snowboard gear. However! Lessons can be expensive so hopefully this guide will help you as well.
How much is it to snowboard on the mountain
Ski resorts require a lift ticket or season pass to be able to snowboard on their mountains. You can pick these up at the base of the resort. If you plan on snowboarding for more then 3 days, I would recommend buying a season pass ahead of time (spring and summer will be the cheapest prices on passes for the following season). To save money and time, purchase your lift ticket(s) ahead of time online at the ski resorts website. Resorts also only sell so many ski passes, so the earlier the better when buying a pass.
Depending on the resort and location lift tickets can cost anywhere from $50 a day to over $200 a day.

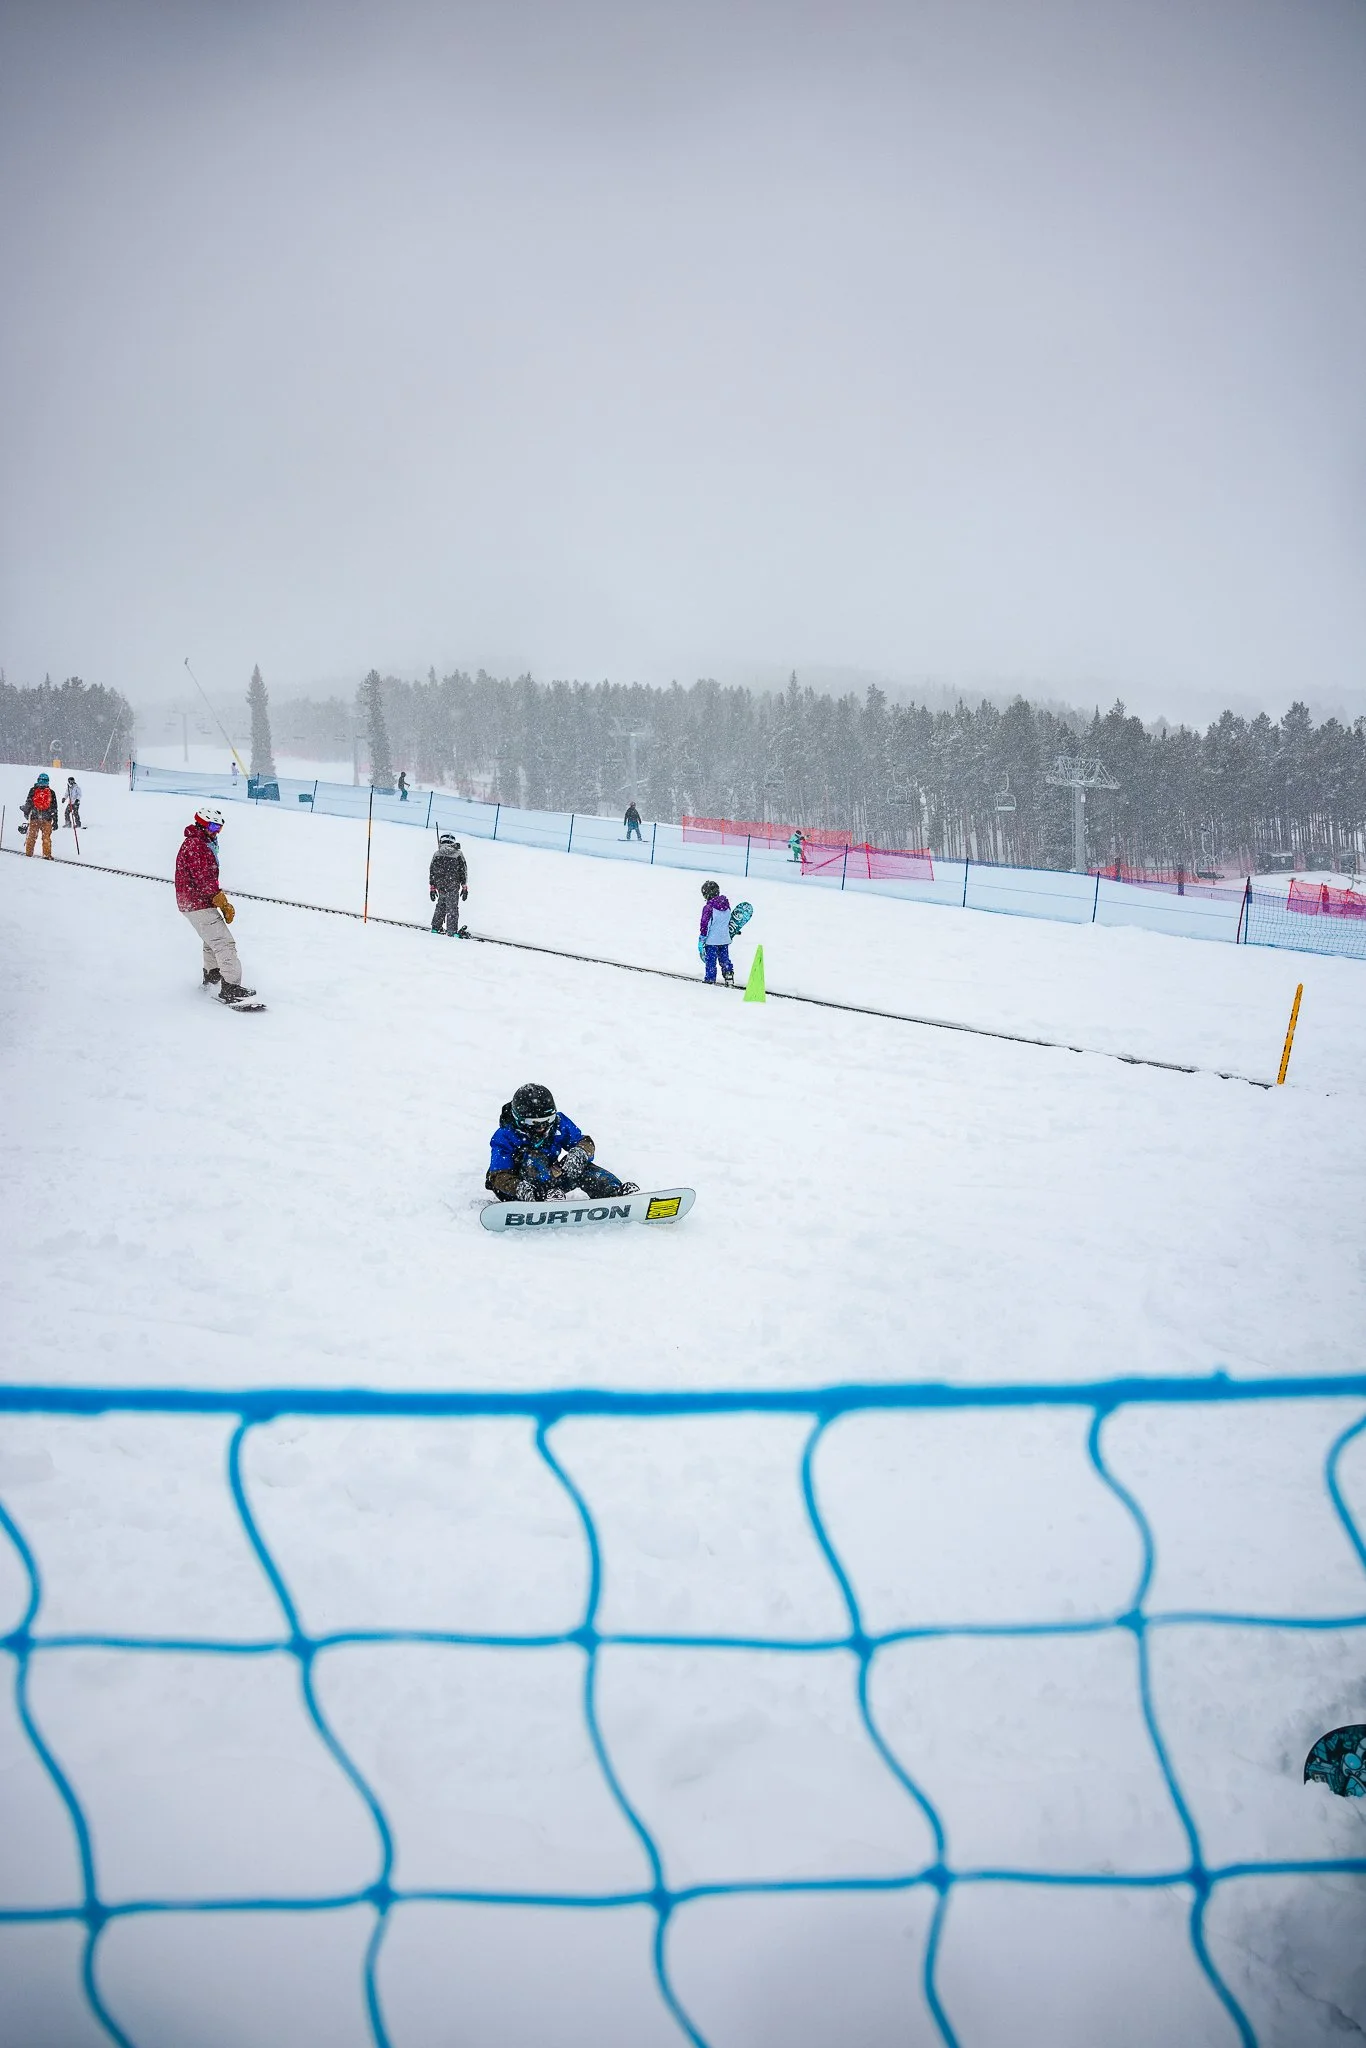
Where should I start once I have all of my snowboard gear
Alright so you picked up your gear, and you are all set up for your first day on the mountain or hill. I would say 99% of ski resorts have a beginner area where you can learn the basics. I wouldn’t even try to get on the ski lift until you have tried the beginner hill, which will more then likely have a magic carpet. Look on the trail map or talk to someone at the ticket office to find out where the beginner area is!

What should my binding angles be set to
I would say +9 and -9 degrees for your bindings is a good start with the stance centered in the middle of the board or at reference. Each binding should be angled out slightly. Your board will also have reference points for the stance so you know if it is centered. It’s also helpful to have someone at the shop where you bought the board at, to set it up. Your bindings will have numbers on them in increments of 3, look for the 9 on both bindings. If you are really short, bump the stance width in and if you are really tall, bump the stance width out.
For rentals, the shop will set the board up for you, but it doesn’t hurt to double check how they set the board up!

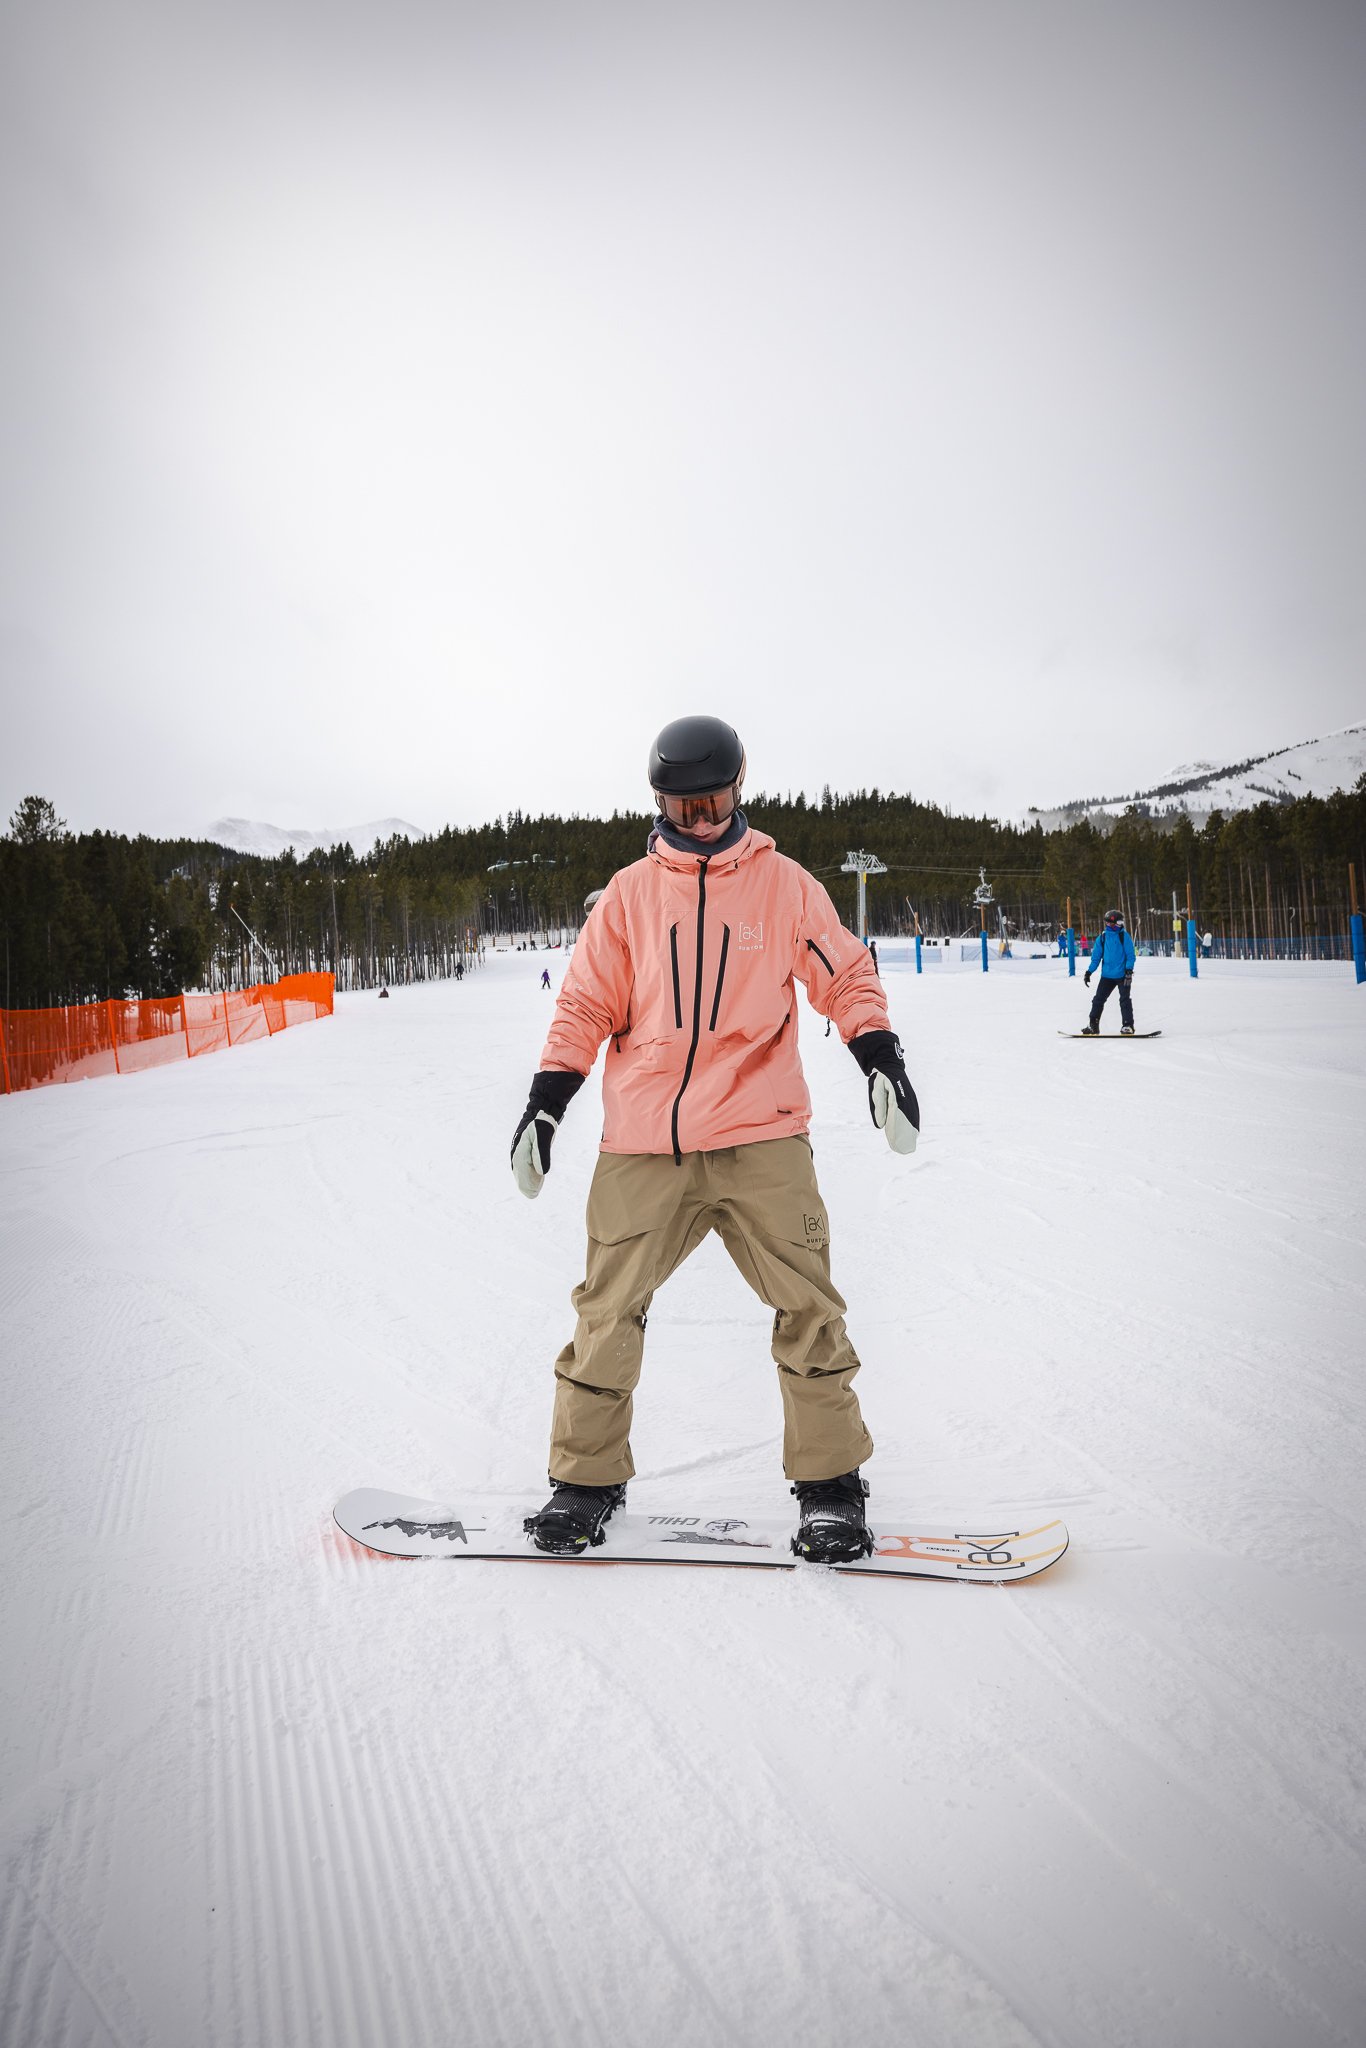
How do I get into the snowboard and decide which way to ride down hill
With snowboarding you’ll either ride down the hill right foot forward or left foot forward. There’s a number of different ways to find out which way you slide sideways down the mountain. Examples include, what foot you use to kick a soccer ball with, which foot goes first if someone were to push you, and the list goes on. However! I would say the best indicator is.. the foot you use to strap into the board first, will more then likely be the lead foot used to go down the mountain!
The easiest way to get into your bindings, unless you have Step-Ons, is to sit down. Clear the snow off your boot and binding and start to crank down the toe and heel buckles. Once both feet are strapped in, see if you can pop up off the ground and balance yourself over the snowboard. If standing up is easier for you try that instead when strapping in.


What next once I’m strapped in
The first run will probably be challenging and be prepared to fall! Falling is part of the learning process. Your main goal on the first day is to get a sense of balance between your snowboard and the snow, understanding somewhat how the board turns.

Beginner Tips to help with getting down the hill or Mountain
You’ll want to first learn how to stop on your heel edge. Do this by putting pressure on the heel edge with both feet as the board slowly moves down hill. You can go straight and then stop with your heel edge once you get comfortable. Please note, this will take some practice! Another way to practice getting comfortable stopping heelside is to ride down “falling leaf”, meaning you go heelside the whole way down the run, while slightly going forward with your front foot then going forward with your back foot.
Once you start to feel comfortable with your heel edge try see if you can go toe edge. You’ll do this by putting pressure on the toes of your snowboard boots and toe edge of the board, while looking downhill. Again, this will take some practice. If you can’t get this on the first day, keep trying!
The key to any board sport is to try to get to a place where you have a good center of gravity and balance. To do this flex the knees a bit and try to maintain an athletic stance. Note, you don’t need to be athletic to snowboard, but try to understand that being centered over the snowboard will drastically improve your day and prevent falls.

Skating on your Snowboard
This is where you push with your back foot to get from point A to B. You don’t really need to learn this on Day 1, however as you progress and start to ride a chairlift it’s important that you know how to do this! Practice at the base of the mountain on a flat surface. It helps to have a stomp pad in the middle of your board for balance and stability.

Linking “S” Turns
S Turns are where you essentially make an S in the snow as you ride down the mountain. This is the last beginner fundamental in snowboarding, so if you're able to do this on the first day, that’s pretty amazing. Combine the heel edge and the toe edge together to link turns which will allow you to ride down the mountain more smoothly. The key to doing “S” turns is to look in the direction that you want to go.


How to get on the Chairlift
If you feel comfortable enough to ride the chairlift on your first day, go for it! The easiest way to get on is to skate up to the line and then look behind you as the chair is approaching. Take a seat and when everyones ready, put the bar down. Either rest your board on the footrest connected to the bar (some chairlifts only have the bar) or put your foot under the heel cup of your binding (see photos below).


How to get off the Chairlift
Once the lift approaches the top, lift the bar up, put your back foot in the middle of the board, push off the seat cushion, and ride straight. Try to be graceful when doing this and avoid getting tangled with other people and your board!


Where to buy a snowboard
Hopefully you caught the bug and want to buy a set up! If so, welcome to the Dark Side as they say. There’s a number of different places to buy a board, boots, and bindings with the best being your local snowboarding shop! Shop employees will be the most knowledgable and they’ll be able to point you in the right direction based on your size, skill level, and type of snowboarding you are interested in. To find the nearest shop, google “local snowboard shop.”
If you don’t live near a snowboard shop, then your next best option is online. Most online sites will have tools and customer service that will be able to assist you in buying a set up. Below I listed a number of great local snowboard shops and their location.
Darkside- Vermont
Tribute- British Columbia
Underground- Breckenridge Colorado
Gravity- Copper Mountain Colorado
The Boardroom- Ellicottville New York
Wave Rave- Mammoth Mountain California
Radio Boardshop- Aspen Colorado


That’s it for how to enjoy your first day on a snowboard. Just remember snowboarding is challenging at first, but stick with it and you’ll have a new activity and a way to spend time outdoors! If you have any questions or comments, please leave them below! It’s always cool to connect with people:) Interested in taking a snowboard trip? Check out Steamboat, an authentic mountain town with awesome terrain (including beginner), amazing restaurants, and of course natural hot springs.

Aspen Colorado, A guide to Maroon Bells and Hiking Crater Lake
Considered to be the most photographed mountains in all of North America, Maroon Bells located just outside of..
Disclosure: When you buy something through the Affiliate product links I have created below, I earn a small commission. I only promote products and companies I support as well as believe in.
Looking for easy trail navigation? Check out Alltrails; an app with trail reviews, navigation, and trail stats. Predownload trails in case of no service.
Considered to be the most photographed mountains in all of North America, Maroon Bells located just outside of downtown Aspen is a great way to spend a day trip or weekend in Colorado, especially in the fall! It’s a bit of a process to get there because it’s such a sought out destination. However, once you get there, it’s definitely worth it.
In this post I’ll be going over how to get to Maroon Bells, parking, what to expect, trail details, and best times to visit. Alright lets do thisssss.

The Maroon Peaks straight ahead are both above 14,000 Feet
How to get to the Maroon Bells and what to know about parking
Parking
Located off of Maroon Creek Road (6 miles from Aspen), to access the Bells you either have to make a parking reservation or a shuttle reservation during the Spring, Summer, and Fall months.
Parking reservations are required from Mid May to the end of October while shuttle reservations are required from early June through late October. The parking is tricky, and to alleviate some of the hassle with specific time windows, Aspen offers a 24 hour reservation option and two day option as well. As long as the road is open it will always cost $10 to park. Maroon Creek Road will close in November when the snow starts to fall. After November 1, no parking reservations are required, however you are still required to pay the $10 fee!

Once the road closes for winter you can access the Bells by snowmobile, cross country skis, and snow shoes. The road will be about 7 miles from T-Lazy-7 ranch.
If you decide to take a shuttle you’ll park at Aspen Highlands. It’s $5/hour or $40/day for parking. Weekends and peak times such as fall, you’ll want to plan ahead and arrive to Aspen Highlands early to get a parking spot. Once you park you’ll check in at Guest Services above the parking area, where the buses are stationed. Aspen suggests that you arrive 45 min before your reservation time to check-in and get your shuttle ticket. The shuttle ride is about 20 minutes to Maroon Bells. Make sure to not miss the last shuttle on the way back!
If you end up driving, the parking lot is at the end of Maroon Creek Road. They will have a separate lot for overnight parking. For more information visit the USDA Forest Service website. Parking reservations fill up quickly, so I would plan weeks in advance if you are deciding to go that route. For Fall foliage make your parking reservation in May, the day of the reservation window opening for September and October.
To make a shuttle or parking reservation visit the Aspen Chamber of Commerce website.


Directions
Please Note, Independence Pass Closes during the winter months usually around the beginning of November
As mentioned above, Maroon Bells and the Crater Lake trail are located off of Maroon Creek Road, past Aspen Highlands Ski Resort. There are two ways to access Aspen during the Spring, Summer and Fall months and that is on I-70 and Independence Pass. Independence Pass is the most scenic route going over the Continental Divide and is 32 miles long between Leadville and Aspen. Below I’ve listed distances and average times from Major areas in Colorado to Aspen Highlands via I-70. For flying, there will be an airport near Buttermilk ski resort, not far from downtown Aspen.
Denver- 198 miles/3.5 hours
Boulder- 204 miles/4 hours
Evergreen- 181 miles/3 hours twenty minutes
Summit County- 132 miles/2.5 hours
Vail- 102 miles/2 hours
History of the Maroon Bells
Created millions of years ago from the Tectonic Plate movement the Maroon Bells and Crater Lake are part of the White River National Forest and also the Elk Mountain Range. The name is derived by the shape of the rock formations and the color (maroon) when the light hits the peaks at the right time.
In the late 1800’s there was a Silver Boom in Colorado and interesting enough Silver is what founded the town of Aspen. However, the town didn’t bring world wide publication until the 1950’s when Aspen became a resort town. As tourism picked up so did trips to the Maroon Bells.
In 1964 the Wilderness Act protected areas like the Bells and Crater Lake.
The two peaks that make up the Maroon Bells are the Maroon Peak and North Maroon Peak.


What makes Maroon Bells so special
The rock that makes up most of the Maroon Bells is a red shale and lighter siltstone called, the Maroon Formation. The maroon color that you see is derived from very small iron particles that have been oxidized (rusted). The formation of these peaks was caused from sea bed deposits over 290 million years ago that were compressed and then elevated with the rest of the Rocky Mountains. These rock formations in the Aspen area are over 3 miles thick. Due to the fact that this kind of rock is brittle and soft, it can break easily, so be careful if you decide to hike in the Aspen Area, especially fourteeners!
Best time to Visit Maroon Bells and Crater Lake
Spring through late October are the best times to visit. Crater Lake is usually dried out by October, as was the case when we went. Honestly, it was still a beautiful hike and the area surrounding Crater Lake is amazing for photography. The best time to hike Crater lake would be in the summer and Fall (June-October). Fall in Aspen is an amazing time to visit because of the fall foliage and leaves changing. This time of year will bring a lot of crowds, so book ahead if you plan on visiting in the Fall!
Late Fall and Late Spring (May and October) are better times to visit if you want to avoid larger crowds. The other cool part about late spring is there is still snow on the peaks and late fall is when Colorado starts to get snow dustings. I think it adds a different/unique perspective to the peaks.
As mentioned above you can still access Maroon Bells during the winter, however one thing to keep in mind is Avalanche Danger when traveling on Maroon Creek Road with snow.
If you are looking to shoot photos of the peaks, the best time to do that is early in the morning, right before the sun gets too harsh. Google Maroon Bells and a lot of beautiful photos of the peaks will pop up.


Is Maroon Bells Dog Friendly
Dogs are allowed they just have to be on a leash at all times due to surrounding wildlife that can show up in the area!
Does it cost anything to Visit Maroon Bells
As mentioned above parking will cost $10 on Maroon Creek road and also $5/hour at Aspen Highlands ($40 for the day)
Biking on Maroon Creek Road is free.
The Shuttle is $16 for adults and $10 for seniors over 65 and kids under 12.

What to Expect and Trail Details
Shuttle busses run every 15 minutes with the last one picking up people at 5pm to head back to Aspen Highlands, make sure not to miss the last bus! Otherwise it’s a nine mile walk back with almost no cell service.
There are couple of trails for day hikes at Maroon Bells with the first one being Maroon Bells Scenic Loop and the next one being Crater Lake. Although Crater Lake was listed as a moderate hike on All Trails, I would rate it as a more challenging hike because of how rocky it was and technical in areas. There was also snow and ice when we hiked it which made the hike even more challenging.


Maroon Bells Scenic Loop
This is a pretty easy scenic trail that goes around Maroon Lake. At times, you will be walking through Aspen trees. Great for families with younger kids or people looking for an easier trek.
Distance- 1.9 Mile Loop
Elevation Gain- 160 ft
Difficulty- easy


Crater Lake
This hike was more challenging then expected. Pretty Rocky and steep at times. You walk through a wooded area at first with mountain views to the left of Pyramid Peak. Towards the top on the right you will see the Sievers Mountain range. As you get towards the top you’ll have breathtaking 365 degree views of the Maroon Bells and the Elk Mountain Range. Awesome hike and I highly recommend using hiking footwear and hiking poles. I saw a number of people with improper footwear and clothing. With improper footwear on a trail like this, you might risk an injury.
Distance- 3.8 Miles out and back
Elevation Gain- 688 Feet
Difficulty- Moderate to difficult

Where is there a good place to stay in Aspen
Snowmass- In the fall, rates here will be cheaper then in downtown Aspen. There’s also other surrounding trails in the Snowmass area if you plan on staying for longer then 1 night. One of my favorite trails was right by the hotel I was staying in called Spiral Point, a must hike for sunset! I booked a room at Stonebridge Inn as they had parking on site, a restaurant, pool/hot tub area, and fitness center. It was about a 20 Minute drive to the Maroon Bells as well as downtown Aspen.

Downtown Aspen
I get it if you want to be in downtown Aspen because it is a cool spot to grab some food, walk around, shop, and enjoy the fall colors around town. The St Moritz Lodge will be on the more inexpensive end for overnight stays with Limelight, The Little Nell, and Hotel Jerome being on the more luxurious side for lodging. There are also a number of awesome options on VRBO.

Is there Camping nearby the Maroon Bells and Crater Lake

Yep, there are campgrounds located near the Bells that will be along Maroon Creek Road. These are popular campgrounds that need to be booked months in advance! The three campgrounds are Silver Bell, Silver Bar, and Silver Queen. Parking at the Bells is included with a campsite reservation, grab your parking pass or print out the camp reservation when driving to the Maroon Bells. Head over to recreation.gov to make a campsite reservation.
Where is a good place to grab something to eat in Aspen
Most restaurants in Aspen will be on the more expensive side. Probably one of the best restaurants in Aspen is the White House Tavern. Located in an old historic building on the corner of Hopkins and Monarch; the ambience, music, simple menu, and amazing food make this a great spot to grab something to eat after a day of hiking.


What to pack
Hiking boots- If you plan on hiking up to Crater Lake, these are a must have. Make sure your hiking boots or footwear have good traction and support.
Hiking Shorts and/or Pants-Not needed, but it’s nice to have some lightweight and breathable clothing when hiking around Maroon Bells or up to Crater Lake.
Rain Jacket- Burton makes a number of awesome jackets, that will keep you dry in case weather rolls through
Lightweight Puffy- Especially if you go in the fall like I did, a down jacket will keep you warm when the temps are low
Water Bottle- Stay Hydrated while hiking!


Maroon Bells Quick tips
Book reservations when the booking window opens, months in advance for Peak times, especially fall
Pack the proper hiking footwear and outdoor clothing
Sunrise-early morning is the best time for Photography
Leave no trace
For shuttles, never miss the last bus back
Looking to visit Aspen in the winter for skiing or snowboarding? Check out Aspen Highlands and what you need to know when Hiking Highlands Bowl. Thanks for checking out the blog and I’ll see you on the next post!

Meet Jeremiah
Growing up, I loved being outside. I took a lot of cool trips with my family, whether it was camping, going to the beach, road trips, and national parks. Even though I didn’t fully appreciate those experiences at the time, as I got older I started getting more into the outdoors and traveling, reconnecting with my past. The feeling of traveling or going somewhere new always seems to give a sense of excitement or adventure.
Snowboarding and boardsports in general have been a passion of mine for over 20 years. I always loved the culture that came with it; from local retail shops to magazines and videos, to riding with friends as well as geeking out on the latest gear, it’s all part of the experience. After working in snowboard/outdoor gear shops for the past decade along with traveling to different outdoor places, I decided to put all of that experience in digital form to inspire and connect with other people.