
Buying a skateboard, Everything you need to know and how to Grip your first Board
Disclosure: When you buy something through the Affiliate product links I have created below, I earn a small commission. I only promote products and companies I support as well as believe in.
With summer in full swing and skateboarding being in The Olympics this year, I figured a lot more people; upcoming youth, adults who once participated, snowboarders, surfers, etc. would be interested in trying skateboarding or getting back into it.
What’s great is skating has a fairly low cost of entry and you can do it practically anywhere, with the majority of skateparks being free. Complete skateboards average around $130-$150 and can last quite a long time depending on use and skill level. In this post I’ll be going over where to buy a skateboard, how to set up a board, and the different parts that make up a complete skateboard. Alright lets do thisss.

what-to-know-when-gripping-a-skateboard

Brief History
Skateboarding originally started in the early 50’s as a way for surfers to get a similar feel when the waves were flat. In the early 70’s a crew of surfers/skateboarders named Dog-Town and the Z boys from Venice Beach California changed skating entirely with a more creative approach. Fast forward to almost five decades later and skateboarding continues to grow in popularity with more people from all different walks of life participating. It has become an activity as well as outlet for many young people across the world!
Where to Start
The best place to start when looking to purchase a board is your Local Skate Shop. Skate shops will have staff that can provide helpful knowledge as well as point you in the right direction based on ability level and experience. If there isn’t a skateshop nearby I would suggest shopping online. However, the experience will never be the same as going into a local shop. Most skateshops have an e-commerce shop and you can either call the shop directly, shoot them an email, or even use an online Chat Service to find the information you need. Each product should have a brief description as well. I like Tactics Boardshop , based out of Oregon. They have three Brick and Mortar stores along with an online shop.
Other skateshops that sell product online that I really like include Embassy Boardshop (Columbus Ohio), Rose Street (Encinitas California), 303 Boards (Denver Colorado), and Val Surf (Los Angeles California).


Deciding what to buy
Boards
There’s a lot of different board companies out there and you really can’t go wrong with any of them. A wider board is typically better for skating transition (bowls, mini ramps, half pipes) while a narrower board will be better for what’s considered street skating (rails, ledges, flat ground). Some great skate brands include Baker, April, Chocolate, Girl, Primitive, Quasi, Toy Machine, DGK and Alien Workshop. Most shops will also have shop decks that cost about $10-$20 cheaper then a branded skate deck if you’re looking to save a little bit of money. Some shops will throw in grip tape when buying a skate deck or you might have to buy your own for an extra $5. Jessup, Mob, Grizzly, and Miles are all great grip tape companies.

Wheels
The diameter of the skate wheel as well as the durometer will be the two contributing factors that are needed to decide which wheels will work for your skating style and experience. Diameter is measured in Millimeters. Typically the larger the wheel the better it is for transition and cruising around the streets or skatepark. Larger wheels are faster and can go over bumps and cracks much easier. Smaller wheels are better for technical street style skating because they are lighter, smaller, and will pop those Kick Flips and Ollies better.
A great wheel size range to start out with, right in the middle is 52-53mm in my opinion. Once you go above 60mm you’re looking at a longboard/cruiser wheel. Top wheel brands include Spitfire, Bones, OJ, and Ricta.

The durometer is how hard or soft the wheel is. The lower the number, the softer the wheel, the higher the number, the harder the wheel. Most skatepark/street skating wheels will have a durometer of 98-103a. These wheels are lighter, slide easier, and have better response for popping the board and doing flip tricks or grinds. Cruiser wheels will have a lower durometer making them faster, softer, and better for cruising around on a sidewalk, bike path, or a boardwalk.
Once you’ve picked out your wheels you’ll need bearings. The rule of thumb with bearings is the higher the price tag the less maintenance required and better materials used for the bearings. Bones REDS are probably the number one bearing company on the market. When it comes to bearings, you get what you pay for, so pay a lil more and you’ll have bearings that last much longer.
Trucks
The last part of your set up will be the trucks, essentially what turns and maneuvers the board. Trucks are an interesting part of the skateboard set up and I’m still learning new things on them. Top Truck brands include Thunder, Independent, Venture, Krux, and Royal. There are Low, Mid, and High truck height sizes. I noticed a lot of trucks on the market these days are Mid height. A taller truck allows you to turn the board quicker while a shorter truck allows you quicker pop and snap. You’ll also want the truck axle width to match the deck width properly. The truck axle is what the skate wheels are attached to.

A local skate shop can help you with that or if you buy your trucks online, there should be a size chart. Each company has a different way of measuring their trucks, therefore always refer to the size chart! For example I skate an 8.38 inch skateboard and ride Thunder 148’s with an 8.25 inch axel. Try to keep the axel width within 1/4 of an inch of your deck size.
The last part about trucks is weight. Trucks come in standard , light, and even hollow light weight sizes. Lights or Hollow Lights will have hollow king pins and axels that allow you to pop everything higher with less effort. If you skate more transition or your a beginner, the standard truck will work better in my opinion because the added weight gives the board more control. Standard trucks are also less expensive compared to lighter versions.
Gripping the Skateboard
Now that you have some skate product knowledge and may have purchased what you need for a complete, I’ll show you how to grip a skateboard below. If you’re new to skating the shop can grip your board and also most online stores provide an option for the board to come gripped. None the less it’s a fun skill to learn over time.
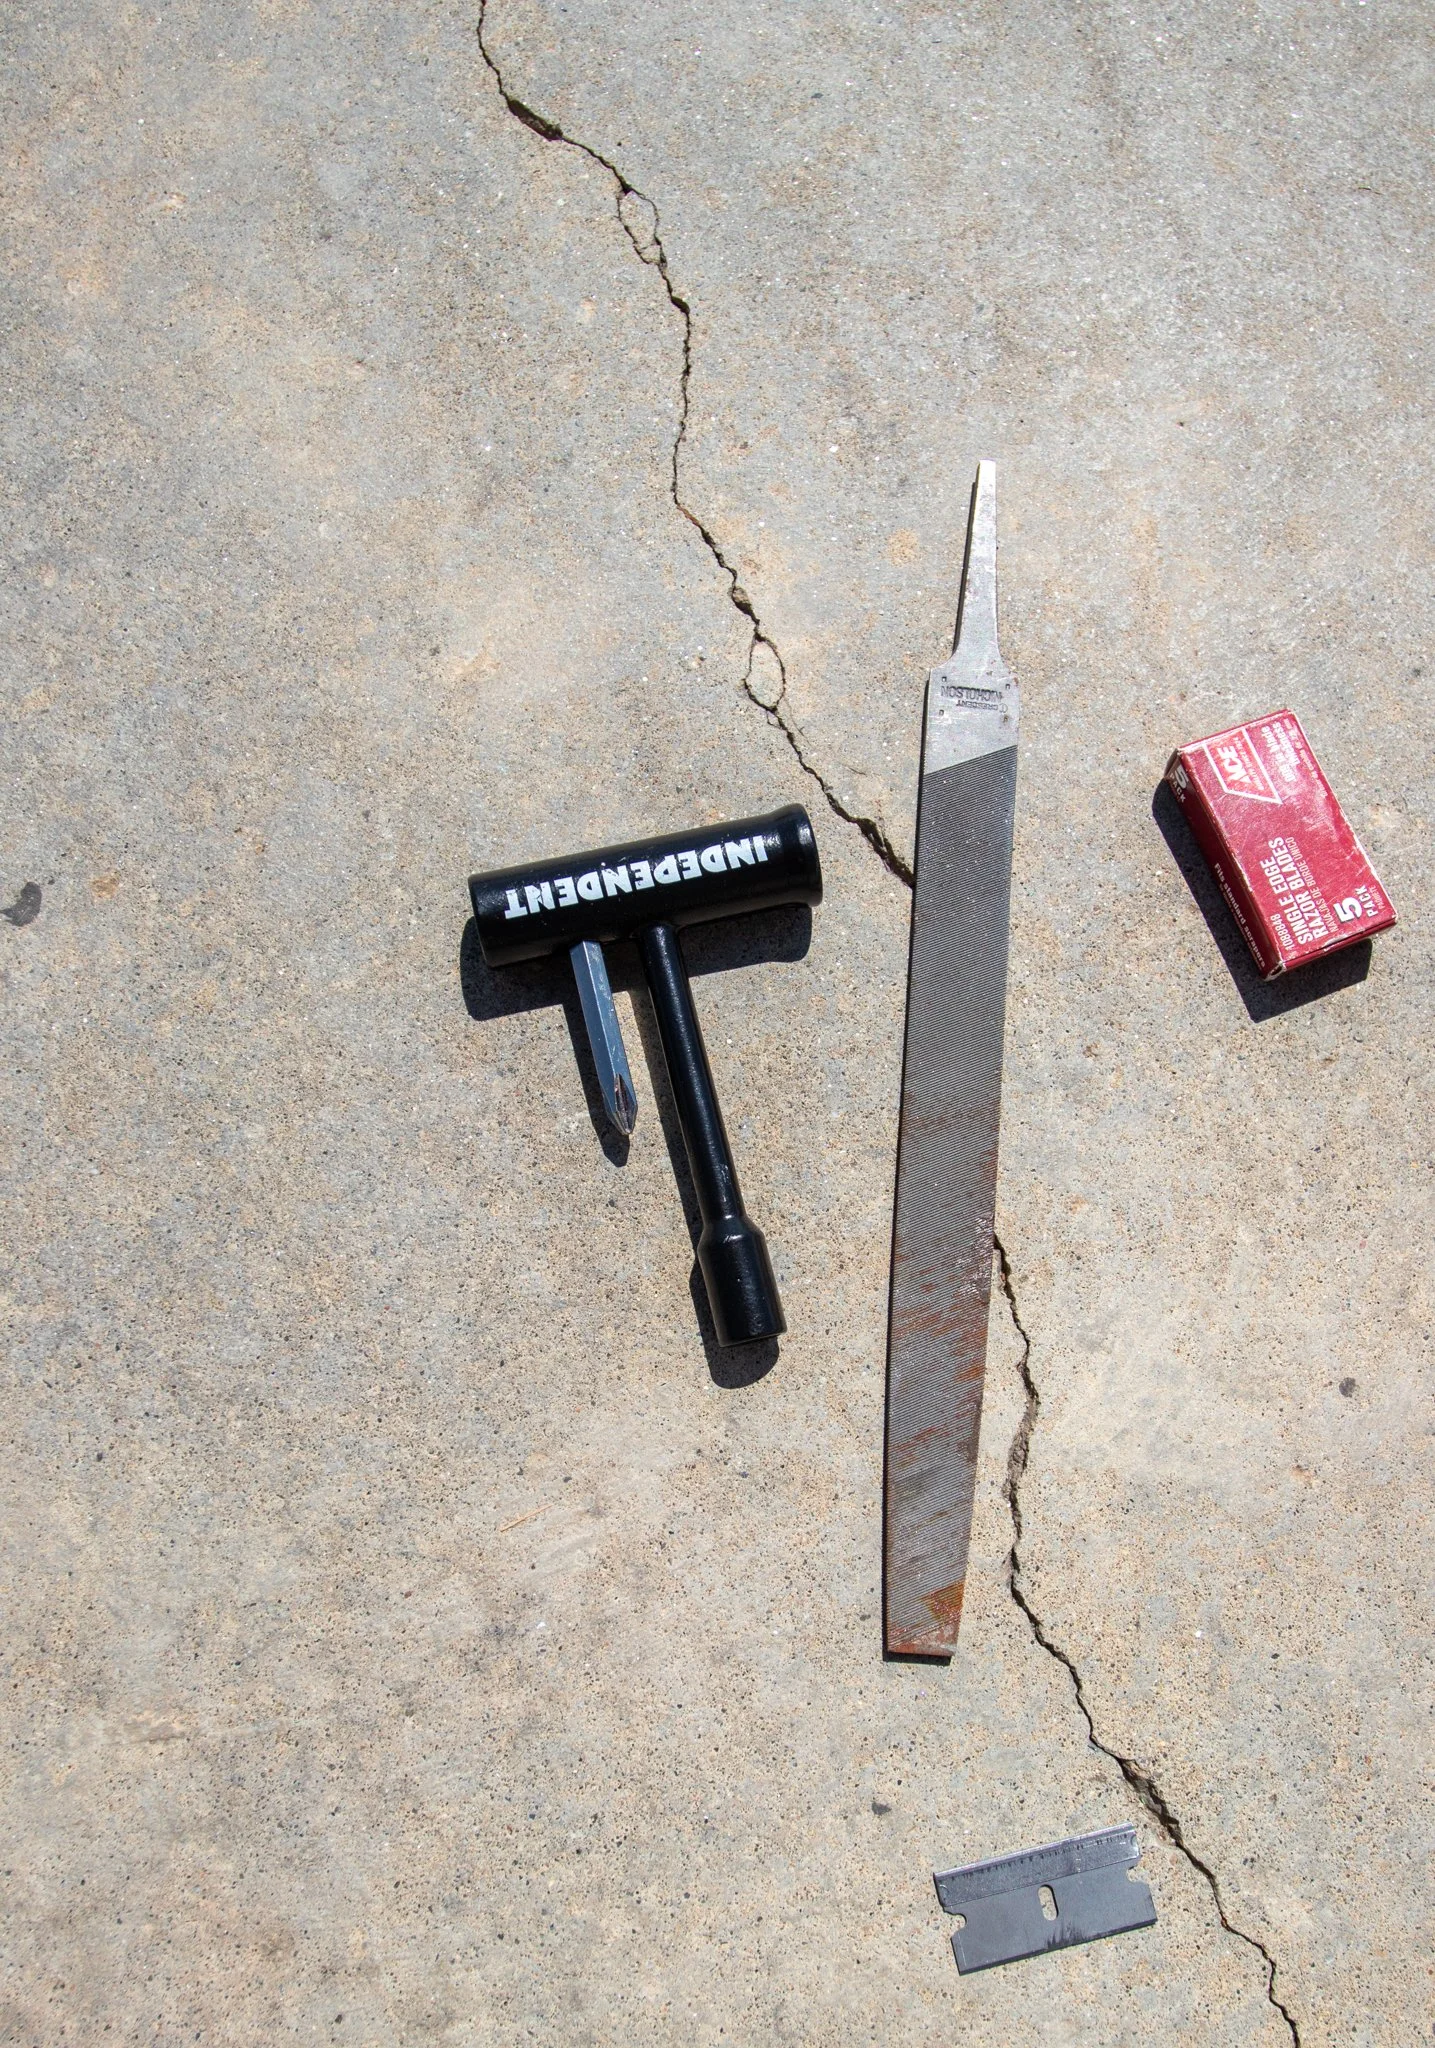
You’ll need a Skate Tool, File, Razor Blade and a #2 Philips screw driver (Burton Bullet Tool)
2. Line the Grip up
You’ll want to make sure that the grip tape is as even as possible around the board before you press it onto the top of the deck. I’ll usually stand above the deck and eye it. It’s ok if it doesn’t line up at first because the grip tape can be easily adjusted as long as you didn’t completely press it down.
Once it is lined up, press evenly starting at one end and working your way towards the other end. Getting rid off any air bubbles. I like to re-use the piece peeled from the grip tape to press better on the top of the grip.

3. File Around the Board
A file can be purchased at your local hardware store, Lowes or Home Depot. Use any part of the file and start to scrape around the edge of the skateboard creating a white line. This is allows you to cut the grip tape around the board smoothly and evenly so make sure to create a nice even white line.

4. Cut around the Deck
I make four different cuts around the board in order to cut the grip tape off in sections. One on each side, near the nose and tail. You’ll then want to cut carefully and smoothly towards yourself holding the razor in one hand and the cut off grip tape in the other.

5. Wheels and Bearings
This requires some muscle, but a good way to put new bearings into new wheels is to either use a skate tool or the axle of your skate truck. If you’re using a skate tool, be careful not to damage the bearings only pressing down on the inner metal circle. You’ll want to line up the bearing to the wheel as evenly as possible.

6. Attach trucks
This is the final part of setting up a complete skateboard. Use your Philips #2 screwdriver, your skate tool, skate harware (bolts/screws) and start to screw the trucks to the board. Don’t over-tighten, until the grip tape breaks in a little bit. If you over-tighten the hardware, you risk pressure cracks with a brand new skate deck. Also don’t tighten your trucks at all, let the bushings break in. The bushing will be the soft gummy part you see on the truck.
With Bones Bushings, they come broken in, which is why I suggest swapping your factory bushings out with a set of Bones. Again, you can purchase these at your local skateshop or online.

Once you’re board is all set up, find the nearest curb, driveway, or skatepark and have fun! Skateboarding is full of amazing life lessons and allows you to connect and meet a lot of different people from different backgrounds. Just remember to have fun with it and enjoy the process of getting better. Thanks for checking out the blog and I’ll see you on the next post!

