
Welcome
I really started The Outdoor Gems to share outdoor experiences through photography and storytelling to inspire more people to get outside. If more people got outdoors; took a walk, hike, went snowboarding, sat around a campfire, and surfed in the ocean, I think the world would be a better place.
-Jeremiah
The Latest

Twin Lakes Colorado, A Complete Guide to the Interlaken Trail
Alright so you’re in Colorado and are looking for a cool historic hike to do. Well, the one unique thing about Colorado other then the amazing outdoor recreation is the historic background a lot of the small towns have. One of these
Disclosure: When you buy something through the Affiliate product links I have created below, I earn a small commission. I only promote products and companies I support as well as believe in.
Alright so you’re in Colorado and are looking for a cool historic hike to do. Well, the one unique thing about Colorado other then the amazing outdoor recreation is the historic background a lot of the small towns have. One of these small towns (about as small as a town can be), Twin Lakes, has a handful of cool hikes to do. One of these hikes happens to be the Interlaken trail, an area that was built in the late 1800’s for more affluent people looking to vacation and get away.
What I like about this trail is it’s right on the lake and doesn't have much elevation gain. Perfect for families with kids along with anyone else who are looking to spend time outside, but don’t want to do a strenuous hike. In this post I’ll be going over how to get to the trail, what to pack, what trail is like, and what to expect. Cool lets gooo

What is the story Behind Interlaken
James Stanley was the man who built the Twin Lakes Resort, after seeing possibilities of the growing Lake County area. In 1883 he sold the resort to James Dexter who then renamed it Interlaken. Guests would take a train to a town five miles east of the resort and then travel the remaining way by a wagon. In the winter, horse driven sleighs took guests across the frozen lake.
Summertime at Interlaken included playing cards, shooting pool, hiking, riding horses, and relaxing. In the winter people went skiing, ice skating, and even sleigh riding. Eventually with a dam being built and lake levels rising, the bridge to the resort became partially flooded and In 1899 Dexter died, along with the resort.
The only resurrection of the resort was during World War I, when the area was turned into boardinghouse. By the mid 1970’s, Interlaken was restored to be enjoyed as a Historical Site, which is what you see today.

How do I get to the Trailhead
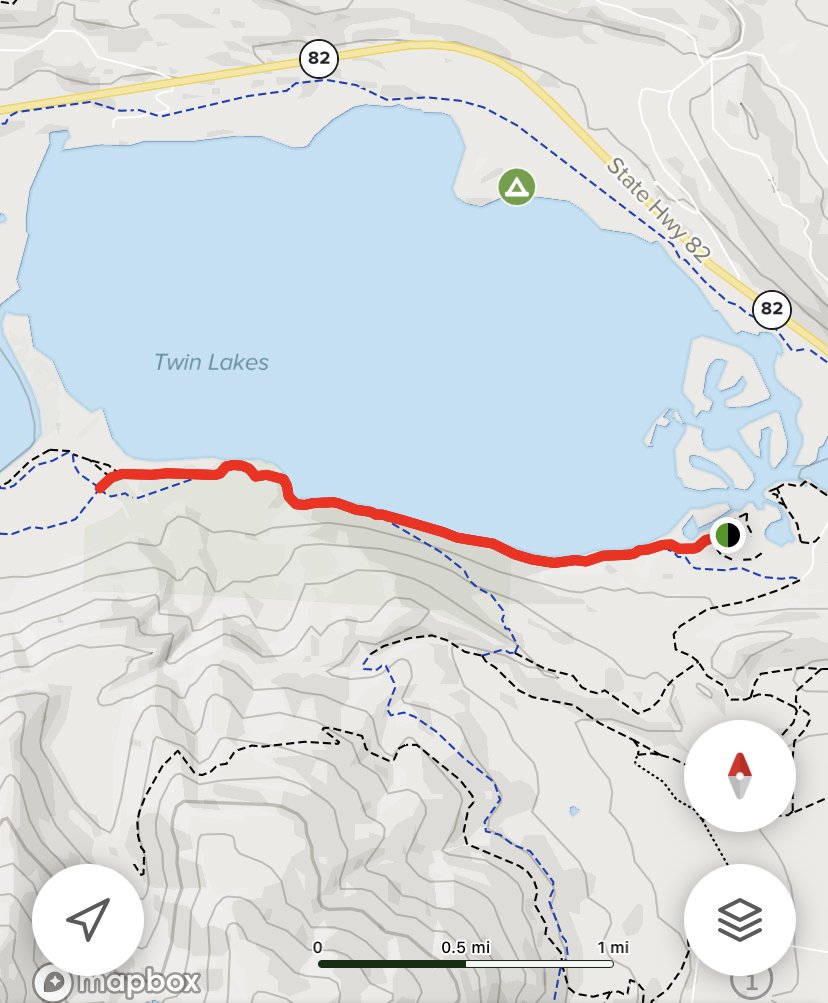
Twin Lakes will be in between Leadville and Aspen with the Trailhead located right before the start of the lake. There are a few ways to get to CO Highway 82, which is the highway the lake is located off of. From Highway 82, you’ll then turn onto county road 25, a dirt road that gets rockier towards the trailhead. I recommend having a vehicle with all wheel drive because of the rocks. If you don’t have AWD there’s the parking lot on the right when your first driving on county road 25. The trailhead is walkable from the first parking lot. Finding the trailhead on this road can be a little confusing, but if you keep going straight, the road eventually veers right, around a corner and you’ll see the parking lot from a distance
The parking lot is pretty big and practically empty midweek and you’ll also notice BLM campsites dispersed all around when driving to the trailhead. Below, I’ve listed times and distances from major areas.
Denver- 2 hours and 15 min/117.5 miles/189 km
Summit County- 1 hour and 15 min/55.5 miles/89 km
Leadville- 27 min/22 miles/35.5 km
Aspen- 1 hour and 15 min/39 miles/63 km
Vail- 1 hour and 8 min/60 miles/95.5 km
Trail Details
A great way to navigate hiking trails such as Interlaken is by using AllTrails. They’ll have trail reviews, info, and a way to navigate the trail if you get lost. Just make sure to download the trail ahead of time!
Trailhead Coordinates: 39.074280, -106.310420
Trail Type: Out and Back
Distance: 4.6 Miles/7.5 km
Elevation Gain: 213 feet/65 meters
Dogs: Are allowed
Trail Time: Depending on speed and how long you stay at Interlaken, 1.5-3 hours


When is the best time to hike this trail
The best time to to hike this trail would be Late May to early October, due to weather and snowfall. Midweek will be a lot less crowded and because Colorado tends to get thunderstorms popping up in the afternoon, I would recommend hiking this trail in the morning.


What is the Trail like and what should we expect
The trail is pretty flat overall with not too much elevation gain making it a fairly easy hike. You’ll get a mix of hiking through trees and lake views to the right most of the way. If you want to stop for a break there’s a couple areas where you can walk down to the lake and hang out. The Sawatch Mountain range can be seen off in the distance, with the second highest peak in North America being Mt Elbert.
Three quarters of the way through the hike, you will come across Aspen Trees, depending on rainfall and time of year, this area is pretty green. It’s a perfect part of the trail if you are into photography.
Once you approach Interlaken there’s a great porch at the main house to take a break and eat lunch (pack a lunch or snacks for this hike). Interlaken is a cool area to just walk around and check out the historical buildings. Each area will have information that you can read surrounding the story of the resort, pretty cool stuff to be honest.
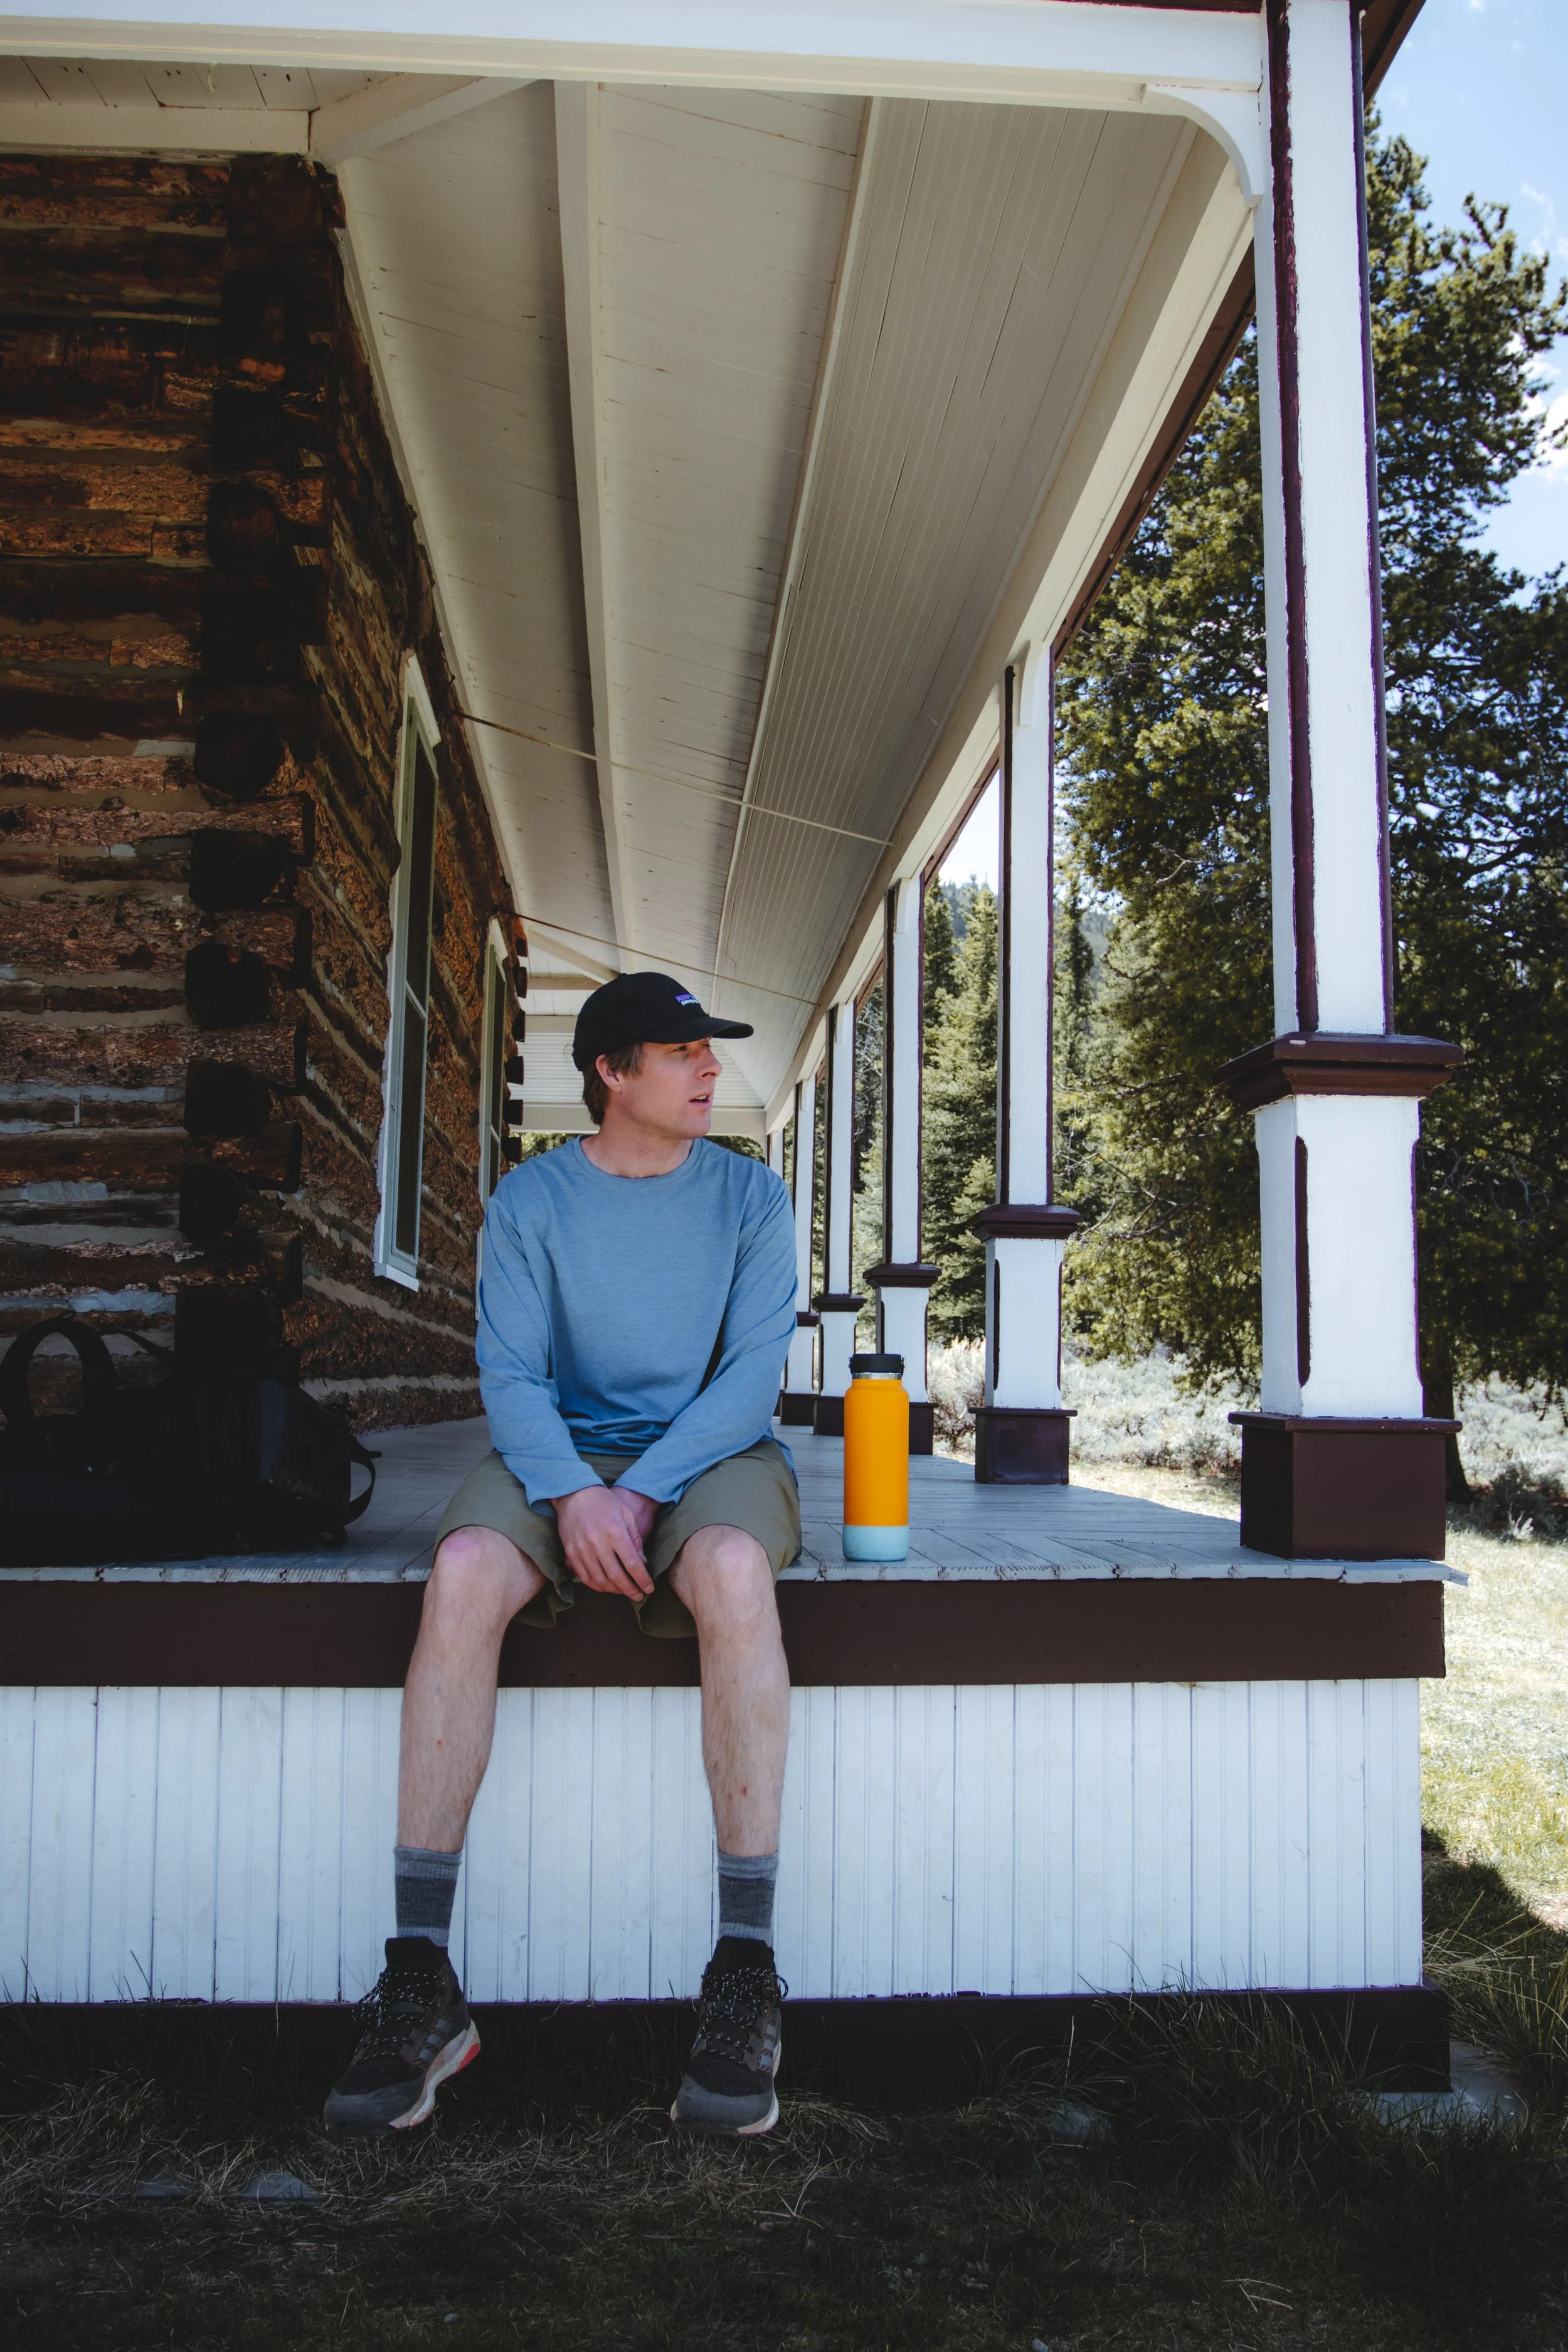

The main house, that was home to James Dexter, is open to the public to walk around in. There’s a book you can sign and also an upstairs to check out. Porch views overlook the lake and surrounding mountains, making it a great place to hang out while you eat something. After checking out the Dexter home, there will be a trail that leads you to the other buildings, including the Interlaken Hotel. These buildings have been long abandoned, but still remain intact allowing you to picture what life use to be like.


Is there another way to get to Interlaken without hiking the trail
Yep, you can rent a Kayak or canoe from Johnny Canoe right on the lake or you can do an Interlaken Boat Tour. To make a reservation visit Twin Lakes Boat Tours website. Johnny Canoe will be near the White Star Campground and there is day parking for a small fee. If you have a paid campsite just use your campsite parking pass and parking will be free.
One thing to keep in mind is if it’s really windy chances are you won’t be able to get out on the lake with a rental kayak, canoe, or SUP for safety reasons.

Best tips for hiking this trail
Check the weather before hand and make sure to pack a rain jacket. Thunderstorms can pop up in the afternoon, so the earlier you get to the trailhead the better. It also doesn’t hurt to pack an extra layer in case temps drop.
All wheel drive or 4 wheel drive will help when driving to the trailhead. If you don’t have AWD there will be a parking lot to your right when driving on county road 25 and you’ll have to walk a little further to the trailhead.
Bring a lunch or snacks for when you reach Interlaken. There’s a few good areas to sit and hang out with views of the lake.
Also make sure to pack a water bottle for the trek.
Pack out what you pack in. Meaning don’t leave any trash or waste behind on the trail.
Don’t feed any wildlife and keep your distance! Colorado is home to moose, bears, foxes, deer and more. Please be courteous.
There are no restrooms at the trailhead so make sure to go before hand.
The sun in Colorado can be intense because you are at a high elevation. Apply sunscreen before you start your hike. This includes lip balm. A hat will also be beneficial for sun protection.
Proper hiking footwear is helpful whenever your out on a trail. If you don’t have hiking boots, hiking shoes will work too because the elevation gain isn’t too high
Be respectful when visiting this historical site and be sure to leave the area how you found it!
What should we pack for our hike
Below I’ve list a few important items that will make your hike much more enjoyable

2. Hiking footwear- Having the proper hiking boots or shoes will make your hike much more enjoyable. When buying hiking boots you’ll want something with good support and traction. I recently bought a pair of Merrell’s and I think they make some of the best hiking footwear.

3. Rain Jacket- I would advise packing a waterproof jacket that is lightweight and packable. Rain showers can happen at anytime in Colorado, so make sure to pack something that will keep you drive if that happens. I really like Burton rain jackets, but brands such as Patagonia, Marmot, Columbia, and North Face all make great Waterproof rain jackets too.

4. Water Bottle- Always pack water when going on a hike! Hydroflask makes some of the best water bottles, keeping water cold for 24 hours.

That’s it for hiking the Interlaken trail, if you’ve hiked this trail before or if you have a question, please leave a comment below! If you’re looking for more outdoor adventures, subscribe to our email newsletter below. Thanks for reading the blog and I’ll see you on the next post!


The Southwest, Top Five Hikes in Sedona Arizona
If you’ve ever wanted to take a trip to Southwest to explore the desert look no further then Sedona. Located in the Northern part of Arizona, this gem is one of the cooler outdoor places I’ve been to. Although not considered a National Park, Sedona has plenty
Disclosure: When you buy something through the Affiliate product links I have created below, I earn a small commission. I only promote products and companies I support as well as believe in.
If you’ve ever wanted to take a trip to Southwest to explore the desert look no further then Sedona. Located in the Northern part of Arizona, this gem is one of the cooler outdoor places I’ve been to. Although not considered a National Park, Sedona has plenty of hiking and biking trails for all levels of experience. It’s also not a bad place to shoot photos either, with all of the different rock formations and red rock colors.
Most of the hikes are within 20 minutes of downtown Sedona and as you drive into town you’ll notice views that encompass the area such as canyons, mountains, and red rock. Other then the views, what I loved most about Sedona is how easy it was to get to the different trails, even on the weekends, when we had to take a shuttle. There’s a lot of different hikes you can do, but I’ll be list five that I thought are worth checking out when you take a trip here. With that being said, In this post I’ll be going over the best trails, where to stay, what to expect, and what to pack. Alright, lets gooo.

Where is Sedona
Located about an hour south of Flagstaff and two hours north of Phoenix Arizona, Sedona is part of the Coconino National forest sitting at 4350 feet/1326 meters. You can fly either into Flagstaff or Phoenix. The drive was pretty mellow from Phoenix and flights were cheaper as well into Phoenix vs Flagstaff. You can either rent a car or take a shuttle if you’re on a budget. The shuttle will be provided by Groome Transportation. Below I listed times and distances for the closest areas to Sedona.
Phoenix- 2 hours/217 Miles/349 km
Flagstaff- 45 Min/29 Miles/47 km
Tucson- 3.5 hours/228 Miles/367 km


When is the best time to Visit
The best time to visit Sedona is October-May with March-May being the busiest time of the year. As you could imagine, summers are pretty hot in AZ making it a less busy time of the year for tourism.
Where to Stay
Staying in Sedona will be the most ideal for being close to trails and the downtown area, however nightly rates will be the highest. If you’re looking to save money and still be within driving distance, a few other areas worth looking into are, Rimrock, Cottonwood, and Oakcreek. Oakcreek will be the closet area outside of Sedona with Cottonwood and Rimrock around 20-30 minutes away.
VRBO is great for looking up properties in any of these areas. I stayed in a nice place in Rimrock, booked on VRBO.


Where to Eat
Although my family and I didn’t eat out much there were a few restaurants that I saw with great reviews. These restaurants did however require reservations, months in advance. Thats something to keep in mind if you plan on eating out at all is to make a reservation ahead of time at any of these 3 spots; Elote Cafe, Mariposa, and the Hudson.
The one restaurant we went to that didn’t require a reservation but was pretty good was the Secret Garden Cafe. It’s a European Style Bistro with Southwest influenced items on the menu. Everything is made in-house too.
What were your favorite Trails
Soldiers Pass- Probably my favorite trail in Sedona, this hike will have some cool stops along the way such as the devil’s sinkhole, seven sacred pools, and soldiers cave at the end. There’s also a canyon floor right before the hike to the cave with 360 degree views of the surrounding red rock formations. I loved the variety of this hike and that it it didn’t feel too challenging. It’s fun a hike to do mid-day into the evening as well, so when your walking back you can catch a good sunset.


Keep in mind that from Thursday through Sunday the parking lot is closed and you’ll need to take a shuttle. Also, the parking lot itself has only 14 spots, arrive early if you want to grab a parking spot. Not to worry if the lot is full, this trailhead is a little over a mile walk to town, so it’s not the end of the world if there isn’t any parking. There is also a shuttle service that will take you to the trail Thursday-Sunday. I wrote a blog post on this trail if you’d like more information, Everything you should know about hiking the Soldiers Pass Trail

Trail Information
Distance: 4.5 Miles/7.25 km
Time: Depending on your speed and how many breaks you take, 2-4 hours
Elevation Gain- 839 feet/256 meters
Dogs- Must be on leash
Best time of the day to hike- Early Morning or Late afternoon
Trail Type- Loop, with the cave being out and back
Trailhead coordinates- 34.88420, -111.78377
2. Cathedral Rock- Although this hike isn’t very long, the elevation gain feels like a lot at the beginning of the hike. At one point I was on my hands climbing up the red rock because of how steep it was. Once you get towards the top the hike levels out. This is also another great trail to do at Sunset. There’s two small parking lots at the trailhead and if you plan on doing the hike in the evening, try to arrive earlier in the afternoon. Keep in mind, this all depends on the time of year you are in Sedona and when the sun sets.
Also note that the parking lot is closed for this trailhead Thursday-Sunday and a shuttle service is provided instead. You can find more information at Sedona Shuttle.com. If you’d like more information on the trail check out, Hiking the Cathedral Rock Trail


Once you get to the top the view opens up and you can see for miles down below. It’s a great spot to shoot photography and you’ll probably see other photographers. Just make sure to be respectful of other people trying to get photos. Try to grab a spot at the top to sit and save it, as there will be other people hiking up behind you. One of the best spots for a photo if you aren’t scared of heights will be on the right side. It’s a narrow ledge that walks out and captures the entire Cathedral Rock back drop. I wouldn’t walk on this ledge if it’s windy or snowy. Lastly, make sure to pack a headlamp with you and a lightweight/warm jacket as it can get cold in Sedona once the sun starts to set.

Trail Information
Distance: 1.2 Miles/2 km
Time: Depending on your speed and how many breaks you take, 2-3 hours
Elevation Gain- 741 Feet/226 meters
Dogs- Must be on leash
Best time of the day to hike- Early Morning or in the Evening
Trail Type- Out and Back
Trailhead coordinates- 34.8251479, -111.7885397
3. Birthing Cave- You won’t find information for this trail at the visitor center as it isn’t considered part of a main trail. However you will find the trail on All Trails, an app that provides trail information and reviews for different hikes. Since this trail is less popular, you probably won’t see too many people on the hike. It’s also not a very challenging hike, which is great if you want a day where you don’t have to walk on a trail for very long.


You’ll start your hike at the Long Canyon trailhead off of Long Canyon Road. There’s a small parking lot on the left where the trailhead starts. We hiked it on a weekday in the afternoon and there weren’t too many cars in the parking lot. If the directions take you to a gated community you’ve gone a little too far. Just turn around and you’ll see the parking lot on the right.

Once you start hiking you will see a fork in the road, veer left and this trail will take you to the Birthing Cave. There isn’t too much elevation gain with this trail even when hiking to the cave. Once you get to the cave, hang out, eat lunch, shoot some photos and enjoy the views. The cave isn’t as big as you would think, but it’s still fun to check out. If you’re looking to get a photo make sure to use a wide lens or the wide lens feature on your cellphone.


Trail Information
Distance: 2 miles/3.25 km
Time: Depending on your speed and how many breaks you take, 2-3 hours
Elevation Gain- 291 feet/89 meters
Dogs- on a leash
Best time of the day to hike- early in the morning or afternoon into the evening
Trail Type- Out and back
Trailhead coordinates- 34.906520, -111.824080
4. Devils Bridge- This is a hike you’ll want to do for sunrise since it is a more popular spot in Sedona. Try to arrive to the parking lot about 30 minutes before sunrise and bring a headlamp, warm clothing, snacks and water to the trailhead. I actually like the beginning of this trail more then the actual bridge because of the awesome backdrop. Again, since this is a more popular trail, parking is closed Thursday-Sun and you’ll need to take the Sedona Shuttle. Parking will be at the Posse Grounds Park and Ride Lot. If that lot is full there will be parking around the corning near the elementary school and baseball field.


If you go midweek there will be a lot less crowds and people on the trail. There’s two lots for parking; Dry Creek Vista Trailhead and the Mescal Trailhead. We parked at the Mescal trailhead because the parking area was less crowded (Even early in the morning on a weekday, people begin to show up for this trail). This parking lot had almost no vehicles in it when we showed up and also had public restrooms. The trail starts out pretty flat (Mescal Trailhead) going through some of the desert forest and then opens up to canyon and red rock mountain back drop views. The signage is pretty straightforward and will take you right to the bridge.


The elevation gain doesn’t really start until you reach the last .8 miles of the hike. By this point you’ll be climbing up some rocks using your hands for stability. As you climb up the rocks watch out for people hiking down, and take your time. As you approach the top you’ll come across a canyon floor that has views over looking the entire area. Keep walking and you will shortly come up on the Devil’s Bridge! If you show up really early, there probably won’t be anyone. However once the sun is up you’re guaranteed to see people get photos of themselves on the bridge.


It’s a pretty steep drop with a narrow walkway, so BE CAREFUL. Someone did die in 2014 and if it’s raining, snowing, or icy out, don’t attempt to walk across the bridge. People are good at taking turns and you can even ask strangers to get a photo of you on the bridge if you hiked it by yourself. If you’re looking to take a break at the top there’s some nice areas to sit and eat some snacks and enjoy the views.


Trail Information
Distance: 4 miles/6.25 km
Time: 2-3 hours depending on speed
Elevation Gain- 521 feet/159 meters
Dogs- on a leash
Best time of the day to hike- Sunrise
Trail Type- Out and Back
Trailhead coordinates- 34.901740, -111.826940
5. Bell Rock Loop- Looking for a good hike to get started with? Bell Rock Loop was the first hike we did and it’s a good one for people who are looking for to hike a beginner trail with not too much elevation gain. The parking for this hike doesn’t have many spots, however there is another lot close by that has more parking and doesn’t fill up as much. Yavapai Vista Point will be the other lot across the road, just make sure to be careful when crossing.

The hike starts off pretty flat with different on options to hike other trails. Other Trails include the Courthouse Butte, Little Horse, and Big Park Loop. Follow the signage and also download All Trails to make sure you stay on the Bell Rock loop.


This trail will loop around the Bell Rock while offering views of the surrounding Coconino National Forest. What I loved about this trail is is the variety of views with different rock formations as well as the loop not being as crowded. Towards the end of the loop you’ll the trail really opens up and you can see a lot of the Sedona landscape.

Trail Information
Distance: 1.8 miles/2.89 km
Time: 1-2 hours depending on speed
Elevation Gain-
Dogs- on a leash
Best time of the day to hike- Early Morning or Evening
Trail Type- Loop
Trailhead coordinates- 34.805810, -111.766330
Best Tips for Hiking in the Desert
Drink and pack enough water for the day- Sedona is at an elevation of 4,350 feet/1326 meters. Higher elevations can cause headaches and shortness of breath. Make sure to drink plenty of water! If you are feeling sick the first couple days, stay away from alcohol and caffeine
Sunscreen- Make sure to apply this at least 15 minutes before you go outside. I personally like Sun Bum because of the non-greasy feel once it’s applied.
Leave no trace- Pack out what you Pack in. It’s important that you respect mother nature and the trailheads. Do not leave trash/food waste behind. Some trailheads will have trash and recycling containers. Pack a trash bag in your backpack. If you have to use the bathroom, most trailheads will have a restroom. If you can’t hold it, go further away from the trail and watch out for wildlife and cactus.
Stay on trail- Only hike on designated trails and paths. There is no camping allowed in Sedona’s city limits and if you decide to camp, be at least 200 feet from water sources.
Plan out your Trip- Do some research and plan ahead of time for which hikes you’d like to do. Because Sedona is close to major cities Phoenix and Flag Staff, understand that trailheads will fill up quickly on weekends and peak times. Get to the trailhead early. It’s helped that there are shuttles that will take you to the trailheads during busier times. Stopping in at the Visitor Center and also having a map of the trail on your phone helps a lot (Alltrails).
Respect wildlife- Be respectful to all wildlife when hiking and do not feed any animals . Since you are in the desert you may come across things such as spiders, scorpions, snakes, coyotes, and javelinas. Keep your pet on a leash at all times when hiking.
Respect others around you- Be respectful of other hikers and bikers on the trails. Give people space and take turns if you are trying to get a photo at a popular spot. You might even meet some cool people along the way when hiking.
Other Hikes to Check out
A few other hikes that we didn’t have time for, but were recommended are Munds Wagon, Boynton Canyon (Subway Cave detour), and Fay Canyon
What to Pack
Water Bottle- One of the best water bottle brands out there is Hydro Flask because it can keep water cold for up to 24 hours and if you want to keep extra water on hand HydraPak makes great collapsable water packs.

2. Light weight warm jacket- If you plan on doing any sunrise or sunset hikes, I recommend packing a lightweight down jacket. The nice thing about down is it’s very packable and you can throw it in your bag when the temperature heats up. The Baker AK down jacket is 800 fill (the higher the fill number the better quality down and more packable the down is), and packs into it’s left pocket.

3. Hiking Boots- Have the right hiking footwear will make all the difference, especially when your climbing up trails like Cathedral Rock. Merrell makes some of the best hiking footwear out there. They make low top and mid top options, and their boots have a Vibram sole that grips really well.

4. HIking Socks- One of the best investments when hiking around all day is a good pair of socks. Stay away from cotton. You’ll want something that is either wool or a synthetic polyester blend. In my opinion Smartwool makes the best socks out there with a lot of different options.


That’s a wrap on some awesome hikes in Sedona! Thanks soo much for reading the blog and I’ll catch you on the next post. If you have any questions or information to add please leave a comment below! Also, if you’re looking for more inspiration on outdoor travel, subscribe to our email list to receive the latest information on outdoor guides, trips, and more.

Meet Jeremiah
Growing up, I loved being outside. I took a lot of cool trips with my family, whether it was camping, going to the beach, road trips, and national parks. Even though I didn’t fully appreciate those experiences at the time, as I got older I started getting more into the outdoors and traveling, reconnecting with my past. The feeling of traveling or going somewhere new always seems to give a sense of excitement or adventure.
Snowboarding and boardsports in general have been a passion of mine for over 20 years. I always loved the culture that came with it; from local retail shops to magazines and videos, to riding with friends as well as geeking out on the latest gear, it’s all part of the experience. After working in snowboard/outdoor gear shops for the past decade along with traveling to different outdoor places, I decided to put all of that experience in digital form to inspire and connect with other people.